Enabled Dataverse search in the Microsoft Dataverse environment
Search is a very powerfull feature when properly configured. Here is a quick step through on how to implement search in Power Pages.
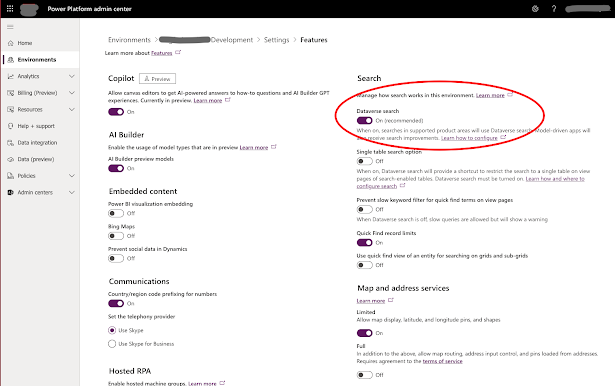

Enable Search in the environment
- Go to the Power Platform Admin Center.
- Open the administration settings for the Microsoft Dataverse environment and navigate to the search or options settings.
- Enable "Dataverse Search." This needs to be done once for each environment.

Enabled Dataverse search in Power Pages
- Go to Portal Management for the Power Pages site and click on Site Settings.
- Filter the settings for search.
- Make sure that EnableAdditionalEntities, Enabled, and EnableDataverseSearch are set to "true."
- Ensure that the table to be included in the search is included in the filters.

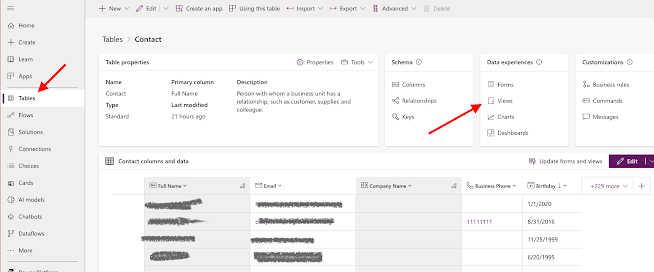
Creating a Portal Search View
To be able to index the columns in each table, we need to create a search view.
- Go to make.powerapps.com and find the table for which you want to create a view, then click on "Views."

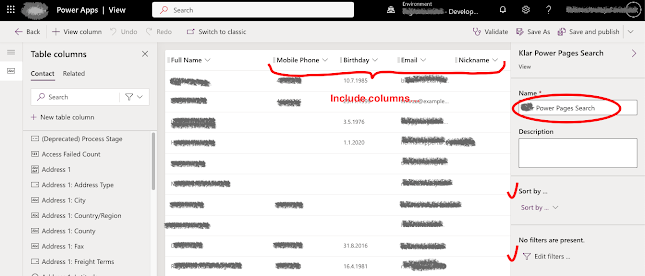
- Create a new public view and give it a name that is logical for the search.
- Apply any desired filtering or sorting.
- Once this is done, go back to Portal Management and site settings.
- Set the Search/IndexQueryName to the name of the search view, "Ready Power Pages Search."

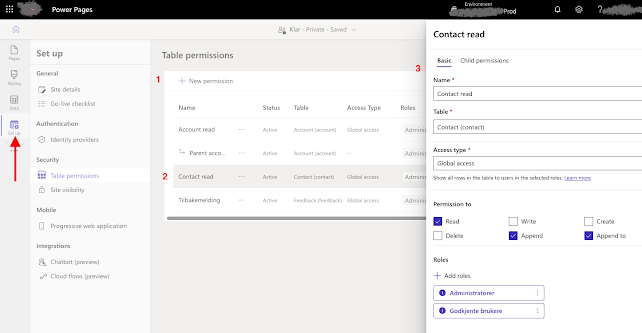
Enable table permissions
To allow users to see search results, we need to set access levels for the table and choose which roles should have read access.
- Go to make.powerpages.microsoft.com, select Set Up -> Table permissions -> create new access and grant Authenticated Users read access.

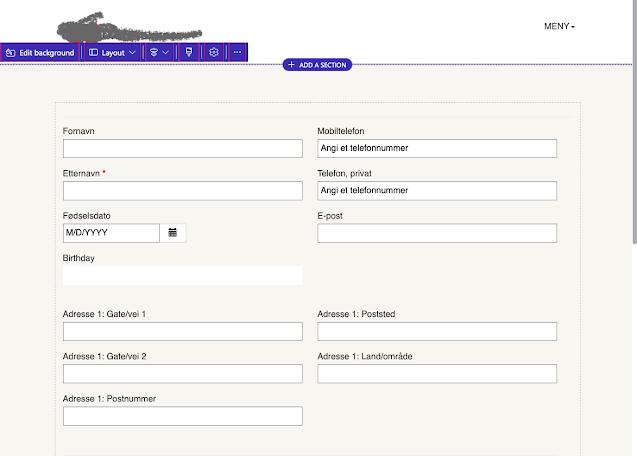
Create a page to display search results
If a page to display details of a search result does not already exist, it needs to be created.
- Go to make.powerpages.microsoft.com and select new page.
- Give the page a name and choose a suitable layout.
- Add a form to the page that will display the result, such as a contact.

Create a Site Marker for the search result
To be able to display the result in the search, we need to create a Site Marker for the search result. This holds the page that is chosen to display the result, but most importantly, it needs to be named correctly. In this case, the name should be "contact_SearchResultPage." Therefore, it is the machine name (logical name) of the table, followed by "_SearchResultPage."


This should cover what you need to include your tables and entities in your global Power Pages search. :)

Further customizations
Here you will find an overview of additional customization options for the search.
Rebuild the search index by restarting the Power Pages website
- To reindex: Go to the Power Platform Admin Center and click on Resources -> select the appropriate Power Pages site and choose Restart Site under Site Actions.

Cheers,
Morten


Comments
Post a Comment